iOS is all about safety, security, and integrity
When it comes to security, integrity, and safety as far as mobile operating systems are concerned namely iOS and Android, the former takes the cake. All thanks to the closed source nature of iOS. Apple, the company behind iOS develops both the hardware and software for its iPhones and iPads which further creates a walled garden for its users from intruders and attackers, unlike Android which is a completely open source mobile OS and hardware made by various manufacturers. These are just one of the many reasons why iPhones and iPads are popular in the corporate world and other key areas and related fields.
Moreover, keeping security and closed source nature in mind, Apple doesn’t allow users to customize or take advantage of iOS the way their users want, for example downloading files or installing custom themes to mention a few, unlike Google’s Android OS which gives users the ability to customize and take control of the OS as per their requirements.
Now, This all brings us to one thing where iOS excels and other OSes pale in comparison. Yes, you guessed it right! Software updates. Wait, not just a mere software update, those Android devices get too (do they?) but, here as far as iOS is concerned we do get consistent and timely software updates. Hang on, it doesn’t stop there, consistent and timely software updates for devices as much as five years old. Impressive isn’t it? However, at the same time, it is not impressive at all considering Apple has been throttling the performance on older iPhones with new software updates lately. For a company that’s obsessed with perfection, this ain’t justifiable at all.
The iOS update scene on older base iPhones is not all that good
With software updates in mind, let’s get to the focal point of the article. Today, let’s check out how to enable or disable software updates from automatically installing on iDevices running iOS 12 or later. You know, there are still a lot and lot of user rocking 16GB iPhone variants out there and those iPhones are either the 6S or earlier models. Speaking of which, installing software updates on 16GB flavored iPhones are a chore due to severely limited storage.
Also, there comes a time when users jump the gun and update their devices, whether new or old right away to the latest and greatest version, not realizing the update may possibly be a broken one. To kind of get around this issue, starting from iOS 12, Apple has finally, given users the ability to control the installation (unfortunately, not the auto download) of software updates. Enough said, let’s get to the tutorial detailed below.
Suggested reading: 5 Reasons Why Linux is Better Than Windows
How to enable or disable automatic installation of an iOS update
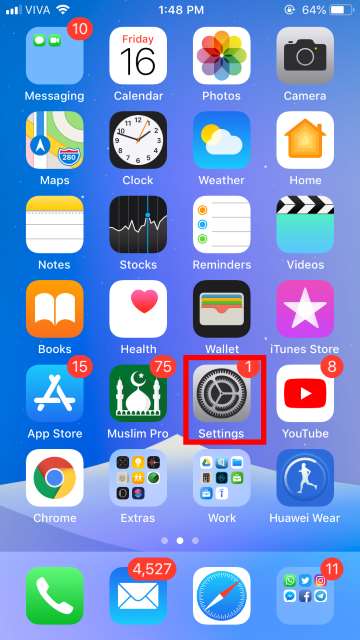
1. On the iOS home screen, locate and tap Settings.
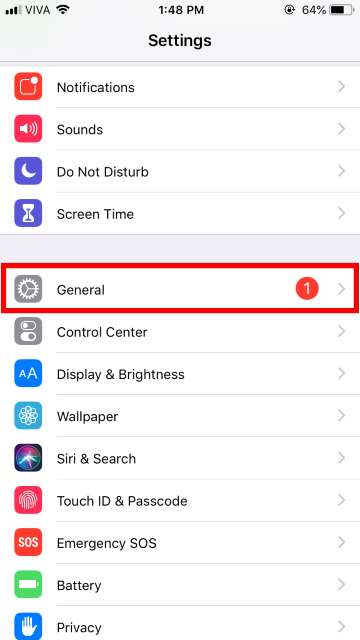
2. Once in the settings menu, scroll down, locate and enter General.
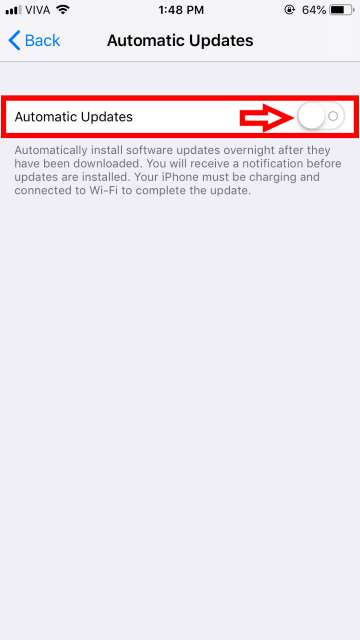
3. Next, enter Software Update and then locate and select Automatic Updates.

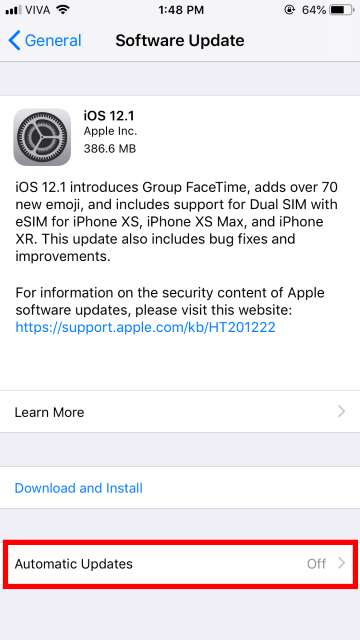
4. That’s all, now you are provided with the ability to control the automatic installation of iOS software updates with the help of the toggle as depicted in the screenshot below.
Tip:
If you are planning to jailbreak your iPhone or iPad, it is better to stay on iOS 12.0.1 or lower, for now, i.e do NOT update your iDevice to the latest and current iOS 12.1 (as of writing this article). A jailbreak for iOS 12.0.1 and lower is in the works, again, as of writing this article. So, what are you waiting for? Go ahead and disable automatic updates as detailed in the guide above.
Read next: How to Disable TouchID on iPhone While You’re Asleep